Using Cloudflare R2 in Leaf-Note
1. Introduction
Service Provider: Cloudflare is a world-leading edge network provider. R2 is its S3-compatible object storage service. It features zero egress fees and global edge distribution, making it a popular free self-hosted cloud storage and note synchronization solution among tech enthusiasts.
Protocol Support: Fully compatible with standard S3 API. It supports simulated file directories, multipart uploads, bulk deletion and object copy. It works seamlessly with synchronization clients supporting the S3-compatible protocol, offering better stability and consistency than traditional object storage.
Free Tier (Permanent Free Plan):
- Monthly free storage quota: 10GB (permanent free allowance)
- Monthly request quota: 1,000,000 Class A write operations, 10,000,000 Class B read operations
- All outbound download traffic is completely free. No traffic bills, no download speed caps, no overage charges for data transfer.
Benefits: Generous free quota, zero download traffic cost, support for custom domains, global edge acceleration, strong data consistency. Ideal for long-term storage of large libraries of notes and attachments. It is the preferred free self-hosted synchronization storage for tech-savvy users.
Target Users: Tech enthusiasts, developers, users with large note libraries and numerous attachments, users seeking unlimited free traffic synchronization, and users comfortable with basic storage configuration.
Limitations: No mainland China edge nodes, so connection speeds within China may fluctuate. Users need to register a Cloudflare account, create a bucket and obtain access credentials manually. Mass public distribution of files is prohibited.
2. Setup
Cloudflare’s official documentation contains detailed instructions. Refer to the official guide Cloudflare R2 Get started S3.
2.1 Create a Bucket
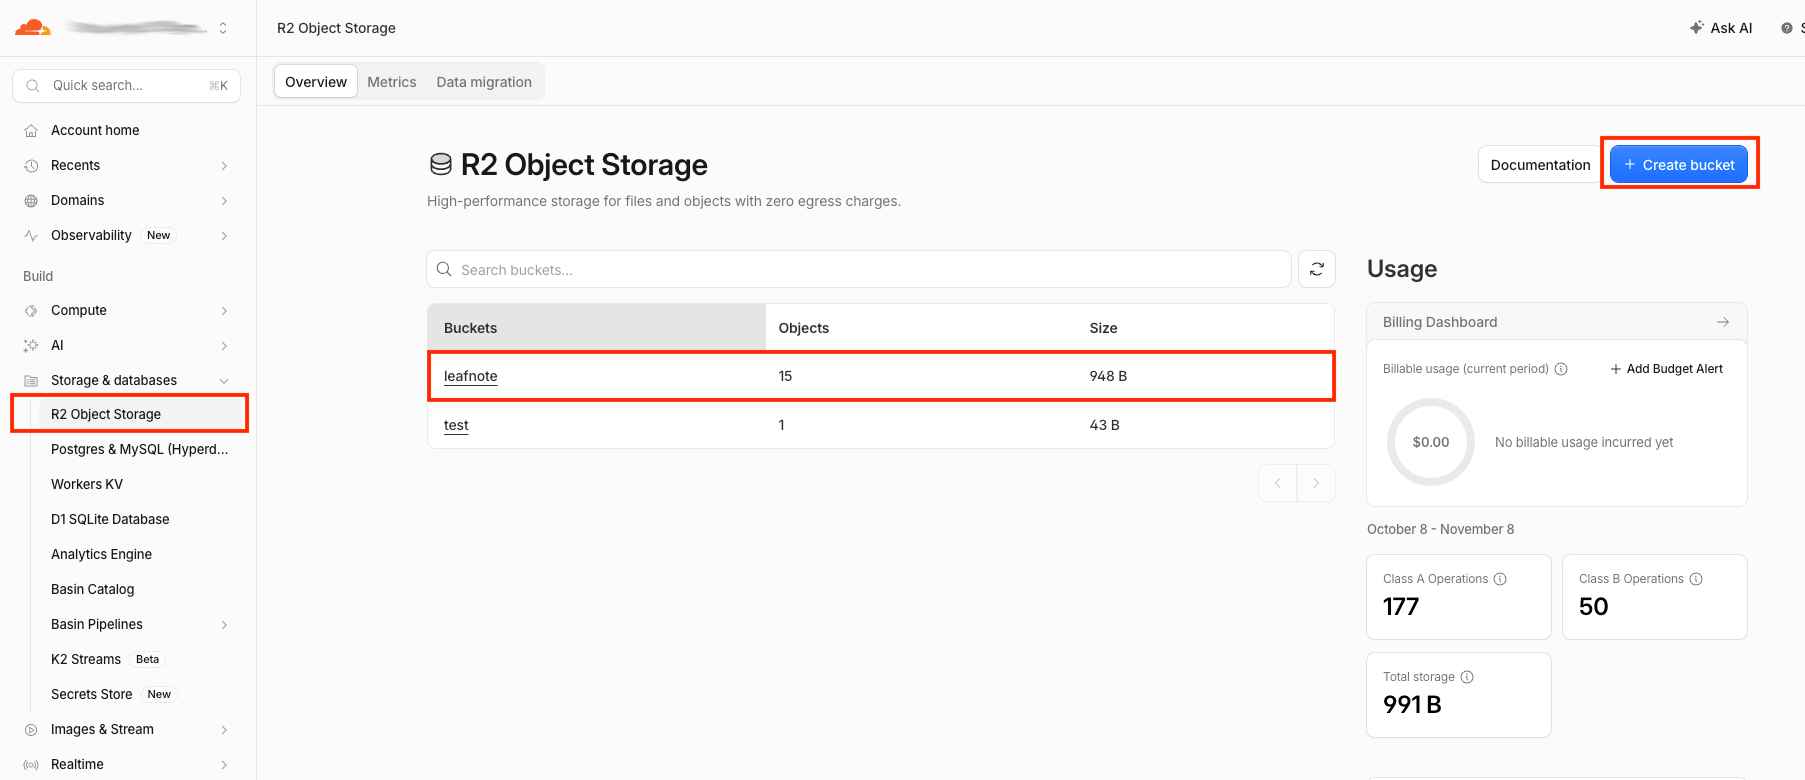
First, create a bucket. Think of it as a storage folder for your notes. We recommend naming it leafnote.
2.2 Create Access Credentials
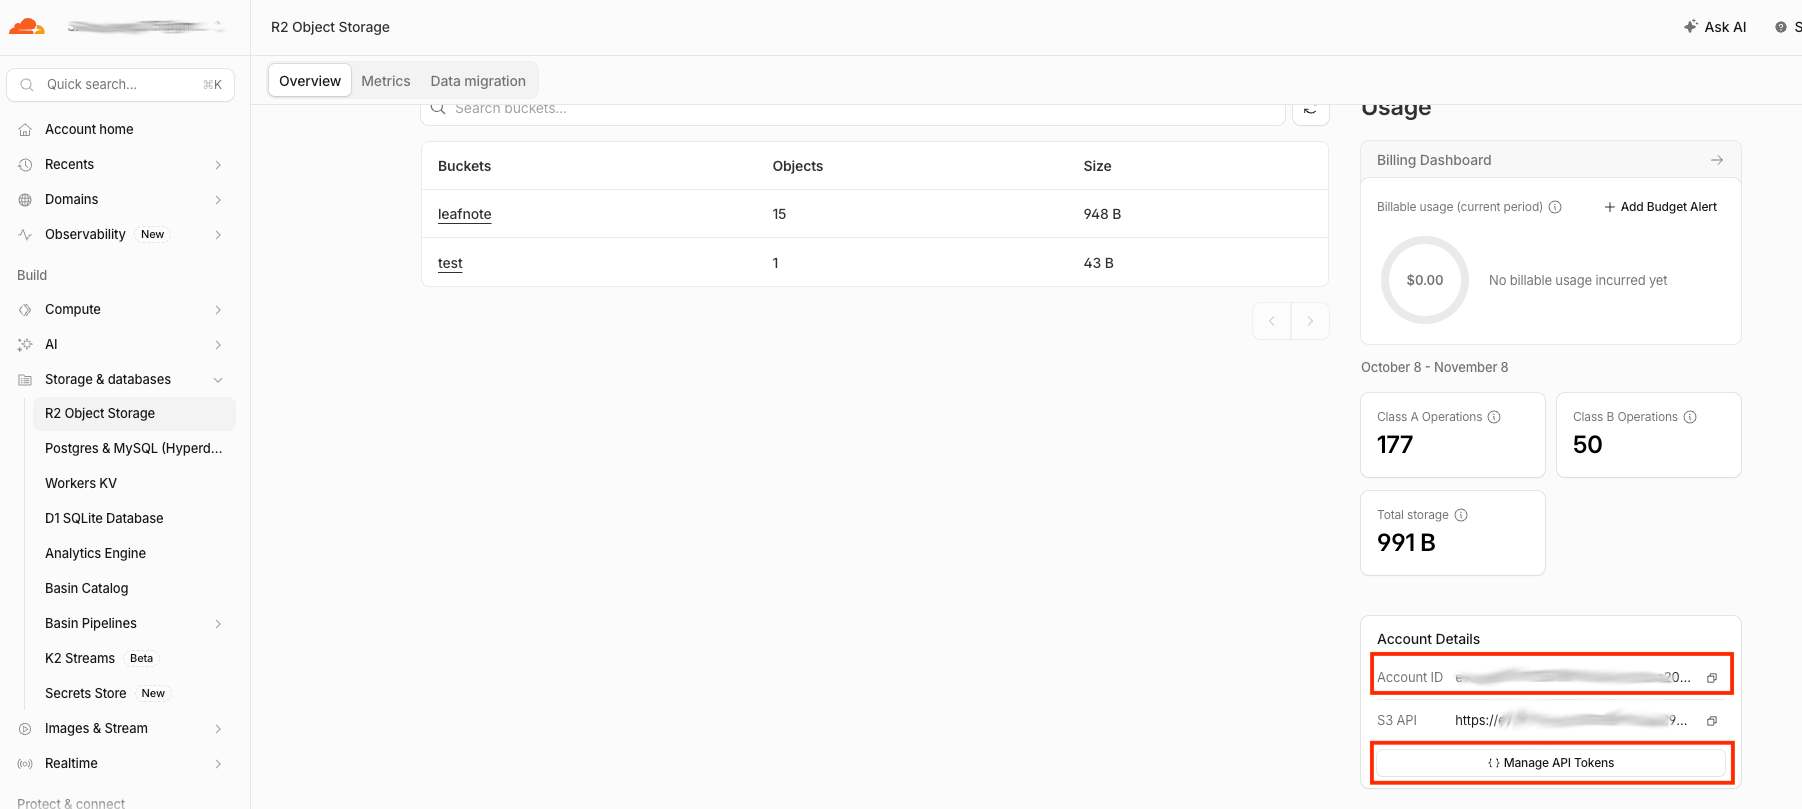
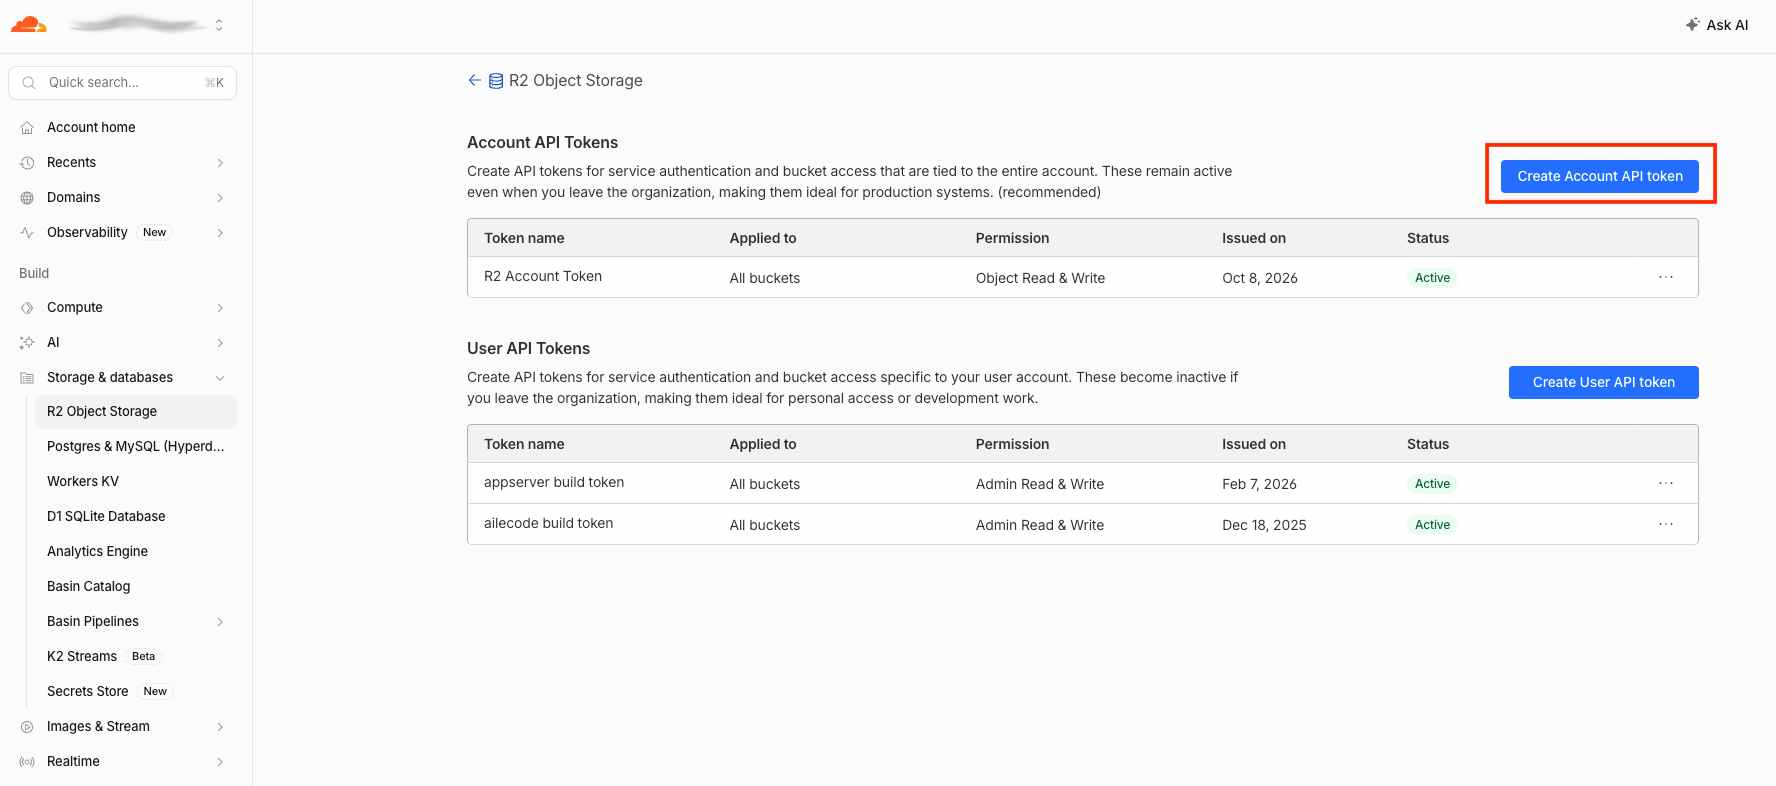
After creating the bucket, generate access keys (or tokens) for remote file access. Your Account ID can be found in the bottom-right corner of the page. Click Manage API Tokens to create credentials.
2.3 Configure Credential Permissions
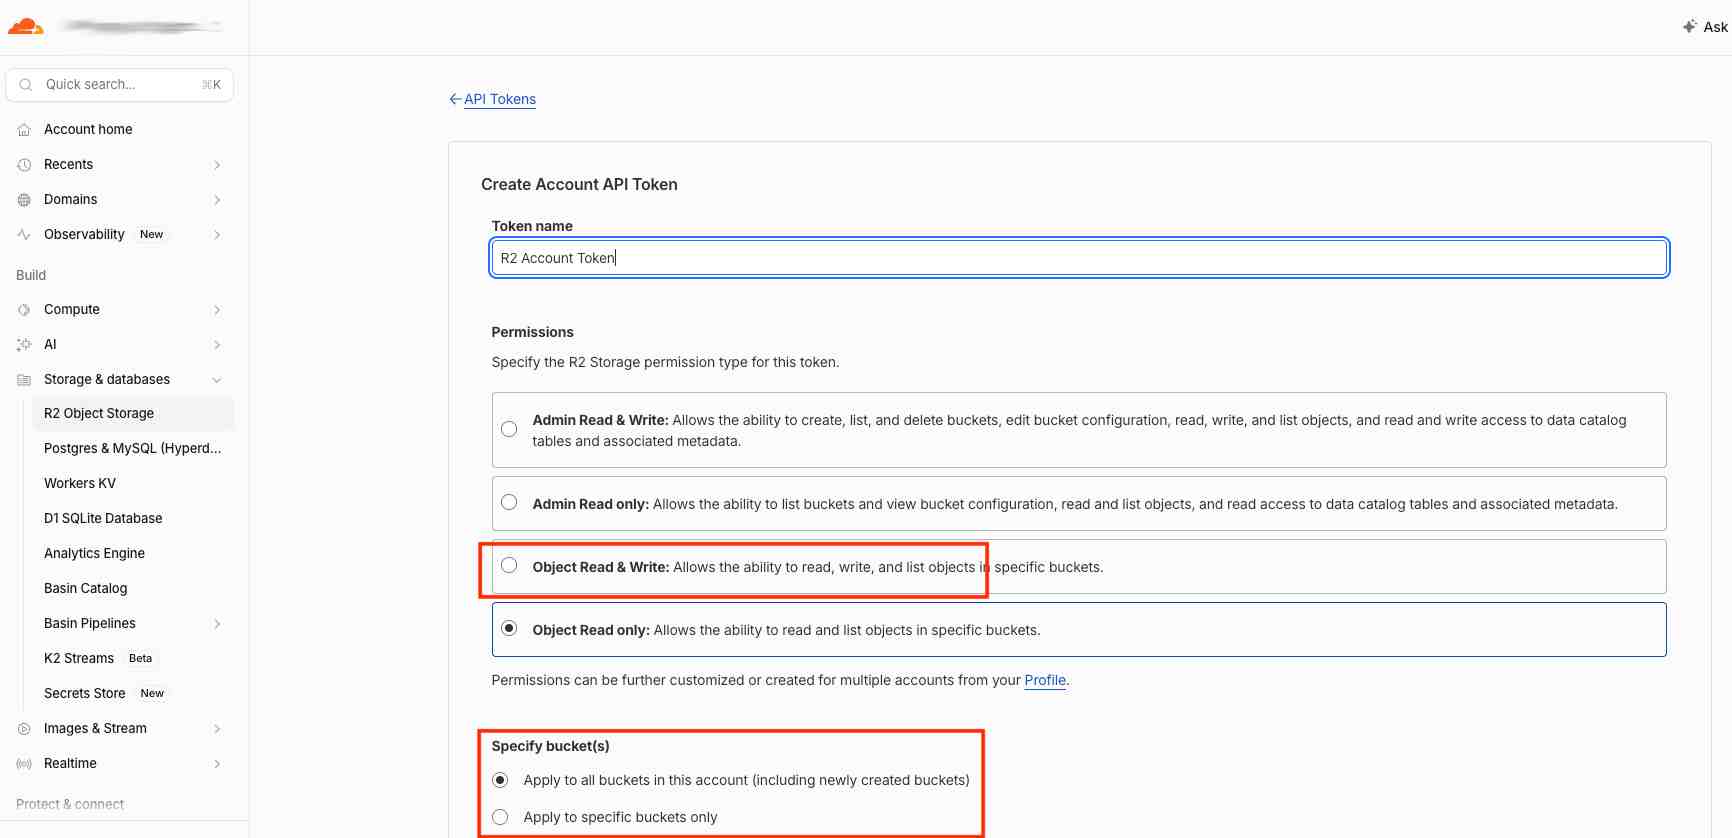
Next, configure your access credentials. As shown below, set the permission to Object Read & Write. Assign the token to a bucket. You may select any bucket, or use the bucket you created in the previous step.
2.4 Retrieve Your Credentials
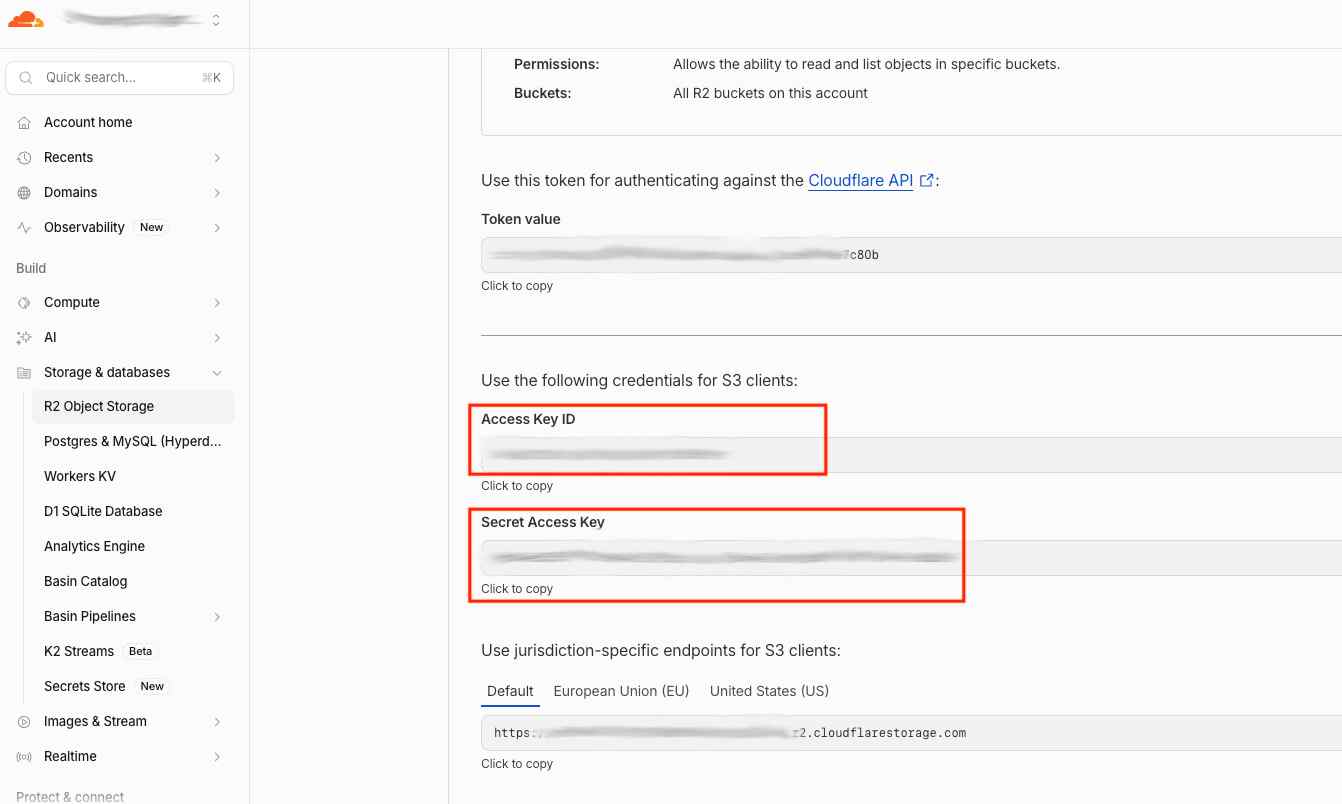
Once the token is created, you will be directed to the credential details page. Copy the Access Key ID, Secret Access Key, bucket name and Account ID. Paste these values into the application configuration dialog to finish setup.